Web Basics
This document should provide you with the basic idea on how to setup a basic web server and its interaction with the web browser. It will not make you a web developer, but at least you may understand some fundamentals for the mini project.
Note that everything described here is a gross oversimplification of what actually happens in your computer. Take the subject 50.005 in ISTD (Term 5) if you'd like to learn more.
How the Web Works (Baby Edition)
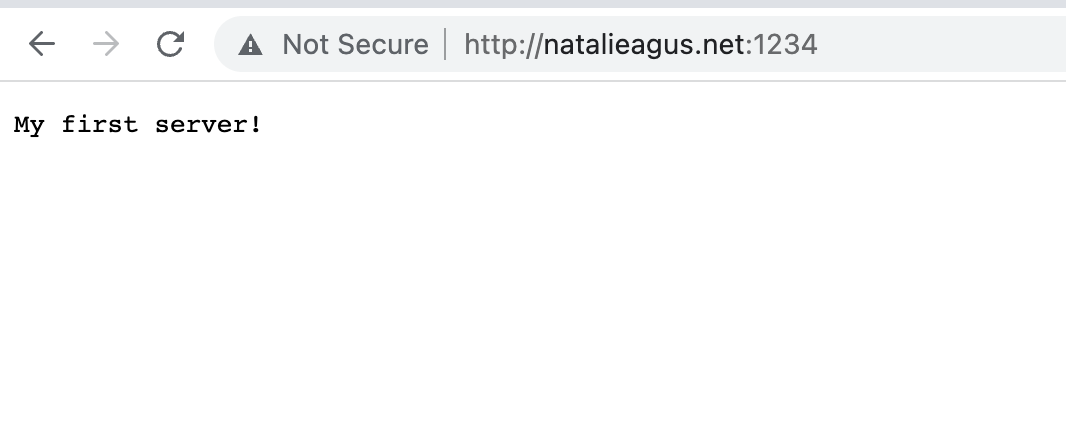
When you type in a URL (a.k.a web address) in your web browser's search bar, you can think of your browser as sending a request message out to the internet to reach the recepient with that address matching the URL you just typed. For example, type: http://natalieagus.net:1234 in your web browser (you need to allow unsecure connection), and you will be faced with this output:
Inspecting a Site
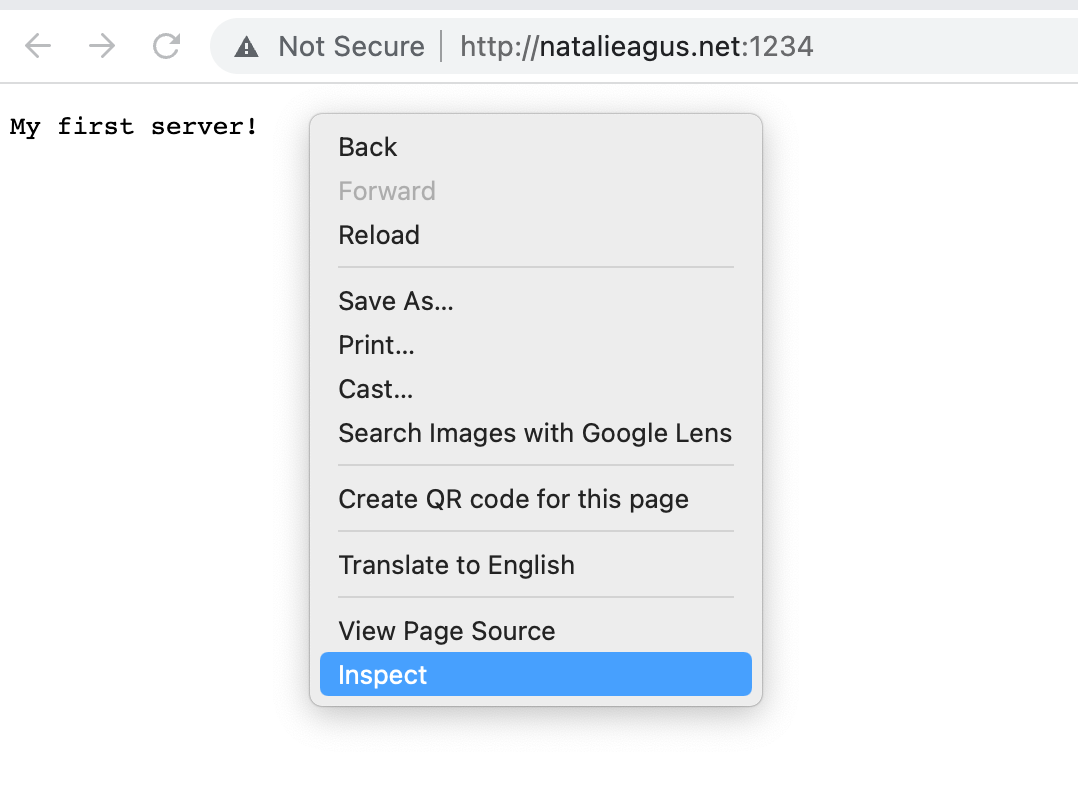
This is a website, an overtly simple website containing just a single text: My first server!. Where did your browser get this particular information? Before we go there, let's see what "this" information is. Right click on your browser and click inspect (you might need to enable developer tools if you use Safari):
Looking at Sources
Under Sources tab you should see that there's only one file called index that's sent by natalieagus.net:1234. Inside that file we can find a text My first server! and nothing else. No color, no styling, no images, no videos, no fancy stuffs that you will find in a modern website. Whereas if you load our course website and inspect, under Sources tab you will see a lot more files being sent over by https://data-driven-world.github.io:
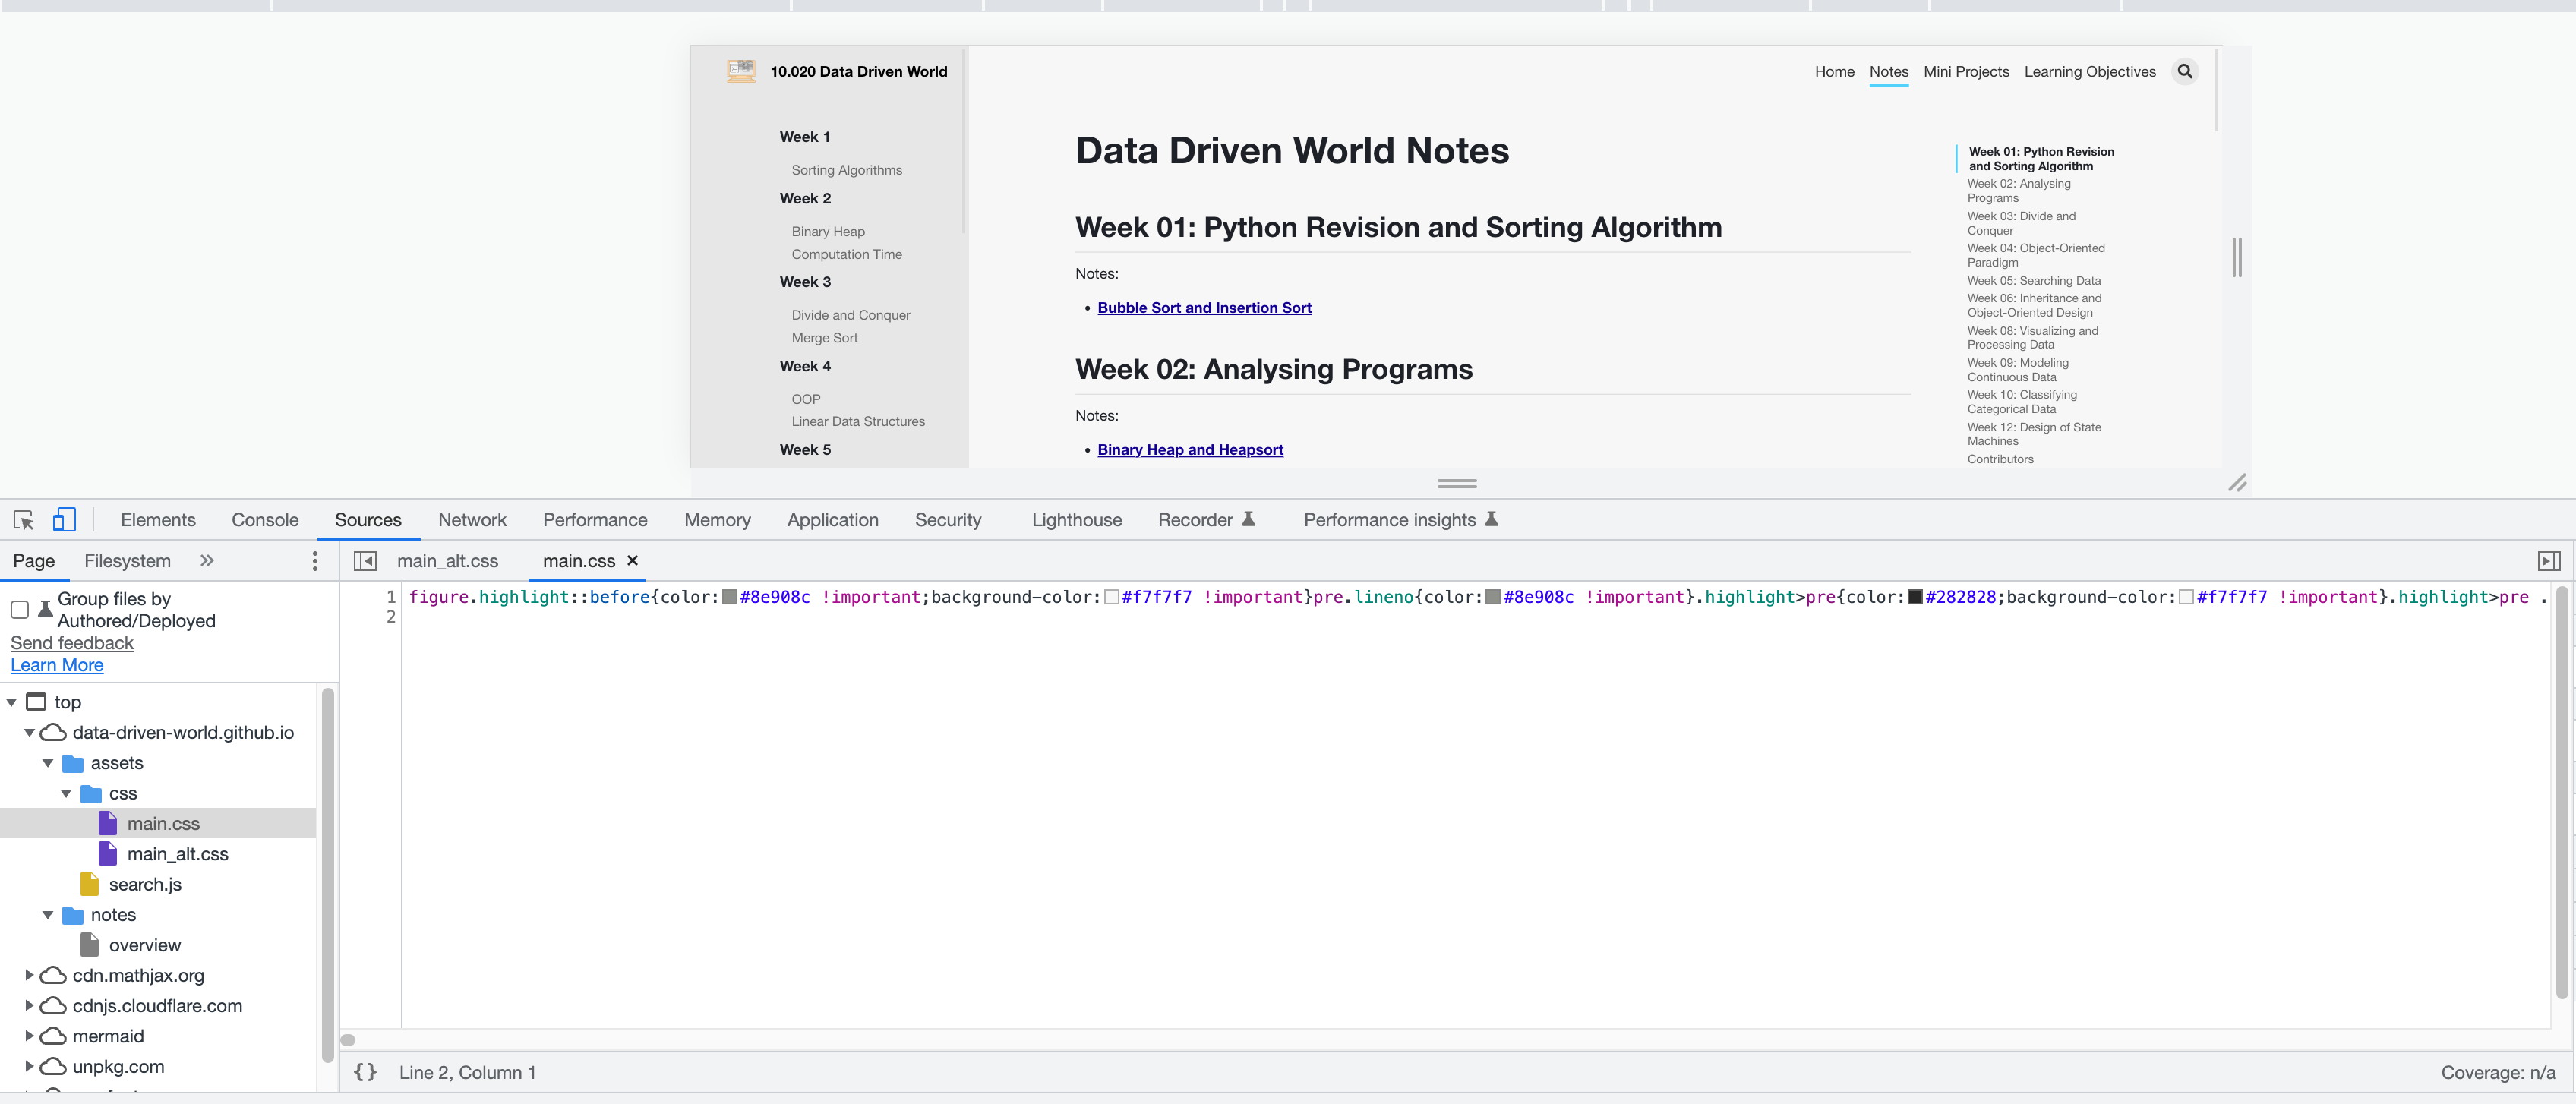
All these files: .js, .css, .html are processed and rendered by our browser so that you can see what you currently see on your browser page.
Web Server
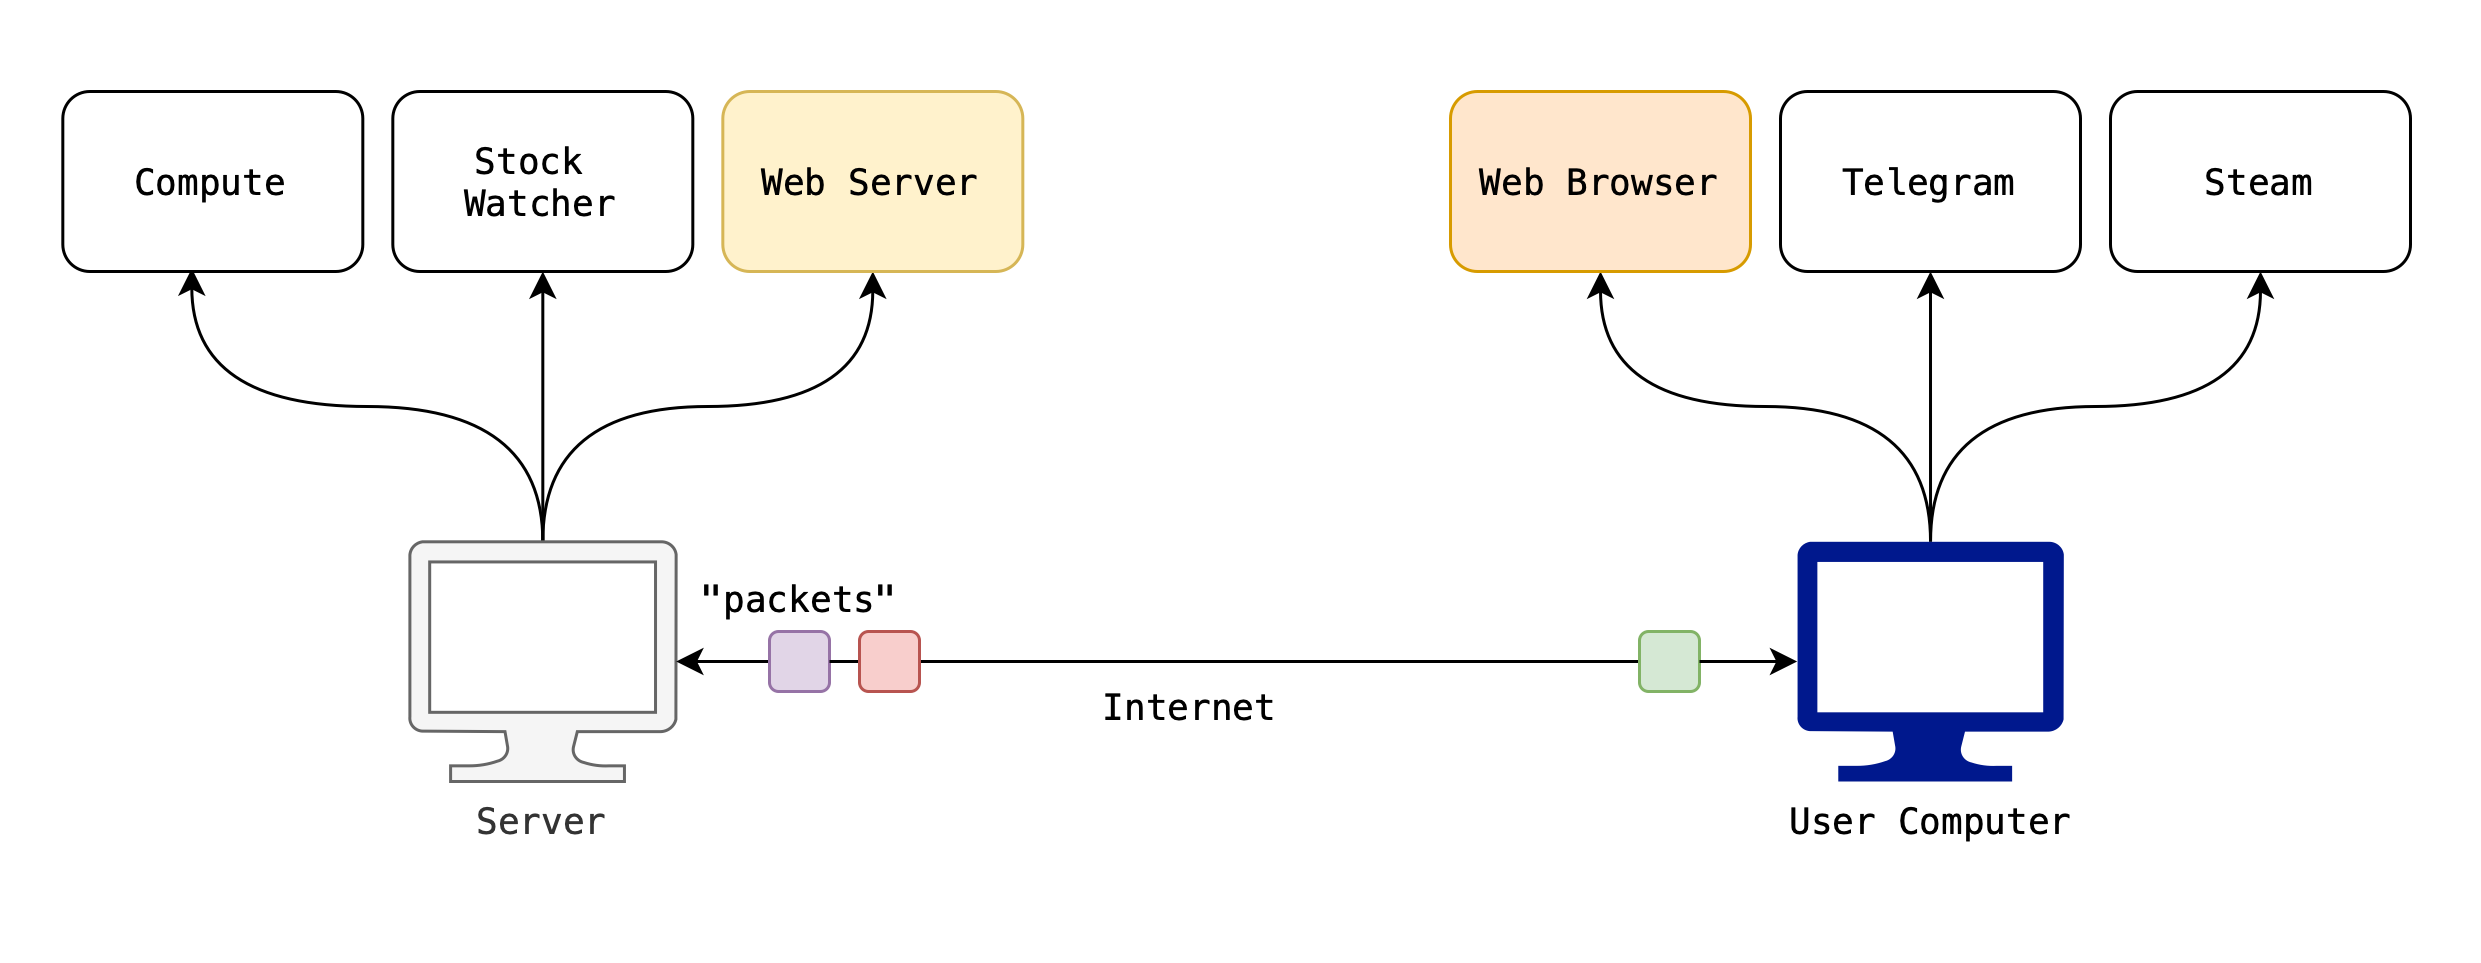
The big question now is: who sent these files over to our browser? Who is this "entity" that answered our "request" when we type in the URL in the search bar, and then reply with these bunch of files for our browser to render and eventually for us to read?
This "entity" is called a web server. Just like a regular restaurant server, the web server's job is to give (serve) relevant files when requested.
A web server is an application (just like any regular application in your computer such as your Elden Ring, Telegram, Web Browser, VSCode, etc) and it typically does not have a graphical user interface. It has one main job, to reply to website-related requests directed to it. The "internet" is just a generic name of various infrastructures to make it possible for your computer to communicate (send "packets" of data) with other computers (servers) around the world so that you can load your Netflix series and play Valorant.
You can think of the Internet as a bunch of roads (medium) made for these "packets" of data to "travel".
Physical Location
So where is the Web Server for http://natalieagus.net:1234?
By where, we mean where is the computer running the web server to answer requests by browsers accessing http://natalieagus.net:1234 located? Well, the web server is run on AWS EC2, so the actual device running that piece of server program can be any of these AWS server locations.
What about the location of the computer running the web server for https://data-driven-world.github.io?
We don't know. Github does not exactly advertise its server locations for security reasons, etc. It could be in the US, it could be in the EU, or it could be right here in Singapore. The beauty is that we don't have to care. We focus on making a nice website and design how users can interact with it, then engage companies like GitHub or Amazon to host (run the program) of our web server.
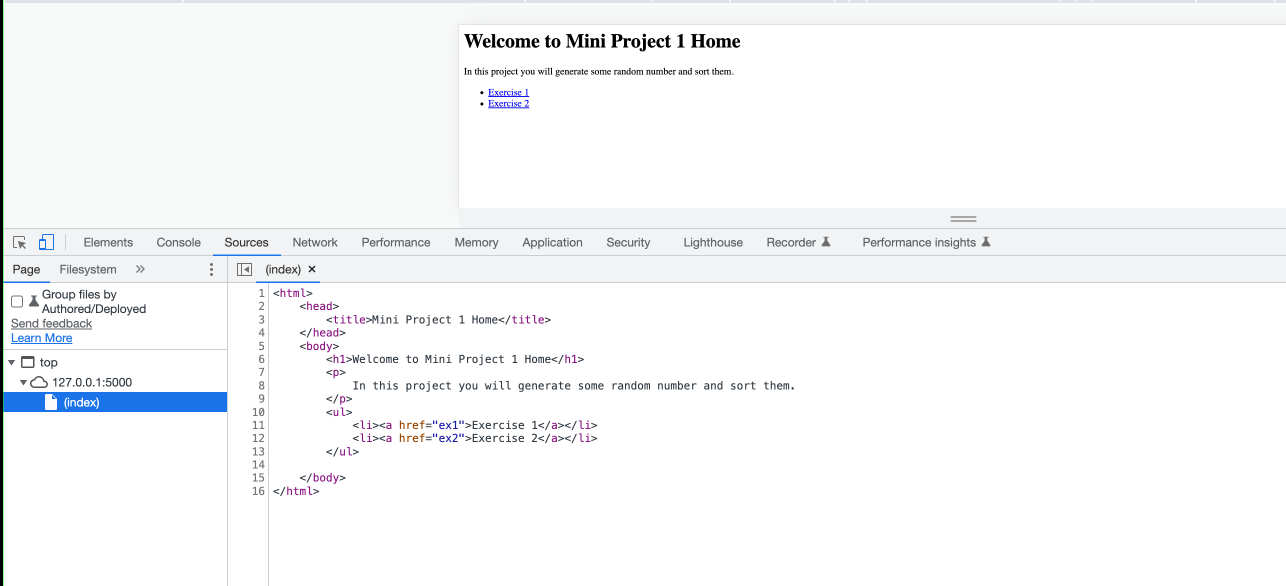
Local Web Server
When you type in the command streamlit run Home.py in your own computer, you are essentially spawning a web server in your own computer. That is why you can access your website by typing the URL http://127.0.0.1:5000/ in your web browser. The value 127.0.0.1 means yourself (your own addresss), so your browser will send a request packet addressed to yourself, which will arrive at the python web server you are currently running. It will then reply with the necessary files for your browser to render the MP1 welcome page:
Hello Streamlit!
It is useful to try to create your very basic own web server in Python with streamlit before going further into the MP.
Streamlit is an open-source Python library that makes it easy to create and share custom web apps for machine learning and data science. With a few lines of code, you can turn data scripts into interactive dashboards and tools, all without needing front-end experience. It's fast, intuitive, and great for prototyping or showcasing models and data insights.
There are plenty of web frameworks out there: Ruby on Rails, Angular, React, and Svelte to name a few. You need to know that not all web frameworks are the same. Some of them are full stack, some front-end, and some are micro-framework. Streamlit is designed more for hosting machine learning and data science. However, we in these mini projects, we will use it to create a simple web app. You can use Streamlit for ML and Data science project if you do the 2D project for DDW.
To create your first web app, create a file called hello_app.py. Edit the file and key in the following:
import streamlit as st

# Set the title of the app
st.title("👋 Welcome to the Hello App")

# Text input for user's name
name = st.text_input("Enter your name:")

# Button to trigger greeting
if st.button("Say Hello"):
    if name:
        st.success(f"Hello {name}!")
    else:
        st.warning("Please enter your name.")
In your terminal, navigate to the folder where you saved the file and run:
streamlit run hello_app.py
Here's a line-by-line explanation of the hello_app.py Streamlit code:
import streamlit as st
- This line imports the Streamlit library and gives it the alias
st, which is used to access all Streamlit functions.
st.title("👋 Welcome to the Hello App")
- This sets the title of the web app. It appears at the top of the page. The emoji is optional but makes it more friendly.
name = st.text_input("Enter your name:")
- This creates a text input box in the app where the user can type their name.
- The text
"Enter your name:"is the label shown above the input field. - The user's input is stored in the variable
name.
if st.button("Say Hello"):
- This adds a button labeled
"Say Hello"to the app. - When the button is clicked, the code inside the
ifblock runs.
    if name:
        st.success(f"Hello {name}!")
- This checks if the user has entered something in the
nameinput. - If so, it displays a success message that says
"Hello <name>!".
    else:
        st.warning("Please enter your name.")
- If the user clicks the button but didn’t type anything, this shows a warning message asking them to enter their name.
This simple app demonstrates:
- Taking user input with
st.text_input - Reacting to a button click with
st.button - Displaying messages using
st.successandst.warning
It's a great beginner project to get familiar with how Streamlit handles interaction.
Conclusion
Notice how whenever you request the URL, the console on the web server app will print out soemthing about GET/ HTTP/1.1. That is the "request" message that's sent by our browser to our web server. HTTP is a well-established protocol for transmitting web-related documents such as the HTML file.
 * Running on http://127.0.0.1:5000/ (Press CTRL+C to quit)
127.0.0.1 - - [08/Sep/2022 13:18:09] "GET / HTTP/1.1" 200 -
We don't need to know or care how HTTP works to send the My first server! reply. This is the magic of web frameworks like Flask, it abstracts away basic details so that we can focus on making your website work. Note that advanced understanding and skill in web development requires you to possess a full stack knowledge, starting from how your computer works, how operating system runs various programs and manage resources (CPU, RAM, Cache, etc), how the internet works, the network protocol stack, network and system security, on top of getting up to date with the most recent web development frameworks and mastery in programming skills (Javascript, Flutter, Kotlin, etc), and possibly knowing how to test, maintain, and scale your project (the DevOps department, buzzword: CI/CD). It can take easily a decade to do all these, so get your fundamentals right and take it easy should you ever want to dive into the software engineering world.
Where to go from here?
The above example show a single page app. Streamlit can also be used to create multipage app which will be the case for your mini projects. You can read the Tutorial for creating a multipage app. This will help you understand the mini project better.